Manage Your Social Media Assets with Loomly's Content Library
Staying organized is a challenge for any social media marketer, especially when it comes to video and design assets. That’s why Loomly provides a newly-enhanced Content Library with digital asset management (DAM) capabilities – easily accessible from your social media management dashboard!
With Loomly’s Content Library, you can eliminate (or at least significantly reduce) the dozens of screenshots currently polluting your desktop or the thousands of unorganized files in your downloads folder by storing your photos, designs, and video content all in one place:
- Label assets to easily sort, locate, and repurpose for future campaigns
- Apply changes to multiple files with bulk actions
- Repurpose visuals by allowing you to create video slideshows for Facebook, Twitter, and LinkedIn from multiple images
- Build post templates that you can use for recurring content
- Clone posts created from templates to share across Loomly calendars in Post Builder
- Create new visuals with Loomly’s Unsplash and Giphy integrations and then edit them from your Library in the Asset View with Loomly Studio
- Improve brand consistency by ensuring only the most up-to-date assets are being shared with your team
- Seamlessly upload media from Google Drive with Loomly’s integration
And so much more! Read on for practical advice and best practices to get the most out of your Content Library in Loomly.
Loomly Content Library Best Practices
Need some inspiration? Here are some ideas for how Loomly’s Library can help you batch create content so you can spend more time where it matters most: engaging with your audience.
Upload content in bulk
You can upload multiple images and videos at once which is a huge time saver, especially if you’re working as part of a team and already have pre-approved visuals that are waiting to be scheduled. Use Loomly’s Google Drive integration to save time uploading directly from your Google Drive folders!
You can also directly upload photos from Unsplash to your library so you can easily find visuals to match drafted copy for posts. This can speed up your workflow and cut out having to choose one-off images as you work your way through the Post Builder.
Use templates for recurring posts and campaigns
Post templates are pre-saved content that you can easily customize and reuse. You can even clone posts created from templates to other calendars in Loomly from Post Builder.
You can easily create post templates from the Loomly Content Library and it works the same way as Post Builder, except it does not have you specify a date.
There are a few reasons to use post templates as part of your social media marketing strategy:
- Promoting seasonal sales campaigns
- If there’s a format that you prefer to use to announce sales like Black Friday or Cyber Monday, templates are a great way for you to draft and schedule similar posts quickly.
- Sharing events like webinars
- When promoting webinars, you’ll likely use similar imagery and copy, so having a template that you can quickly modify will save you valuable time.
- Publicizing store hours
- Regularly announcing store hours is a great way to drive foot traffic to your store so having a template you can work off of will speed up the process.
- Tracking URLs to your website using UTMs
- Loomly lets you build URLs with UTM parameters for easy tracking so you can store templates with URLs that have the correct UTM parameters ready to go!
- Maintaining a brand aesthetic
- Post templates are an excellent way to ensure a consistent look and feel that aligns with your brand guidelines and resonates with your audience.
- Keeping different styles for each social media channel
- Post templates let you specify the social channel so you can have different post templates per social media channel that have a distinct look and feel.
How to organize your Content Library
A great digital asset management tool lets you easily surface the visuals that you need. No one wants to hunt around for the correct video or image so here’s how you can keep your Loomly Content Library organized.
- Labels
Add labels to every asset including visuals and notes. Labels are a way to associate assets with specific campaigns or brands. You can then filter the view by the label so you only see the associated assets for easy reference, planning, and scheduling.
- Track logs
By seeing the logs of each asset, you can see the changes made, whether it’s the most updated version and has been used in a post, and who has worked on it like your designer or social media manager.
- Mark as used
If you posted an asset using Loomly, it will automatically be marked as used so you can see what assets are still available. If you natively posted the asset or used it in some other medium like a blog post, then you can mark it as used so that you don’t accidentally double post.
Batch content creation
One of the best perks of Loomly’s Library is that you aren’t restricted to one content type. You can upload images and videos as well as add in notes to store text or ideas for posts.
This makes it extremely easy to quickly compose multiple posts by just selecting the correct note and visual, creating a post, and then moving onto the next.
Loomly’s Content Library Enhancements
Now that we’ve gone through some best practices, here’s what you can expect by toggling through the different views we offer as part of Loomly’s Library.
Grid View
The Grid View is what you’ll first see when you land on the Content Library. This is a great way to focus on your visuals and see everything that has been uploaded to Loomly.
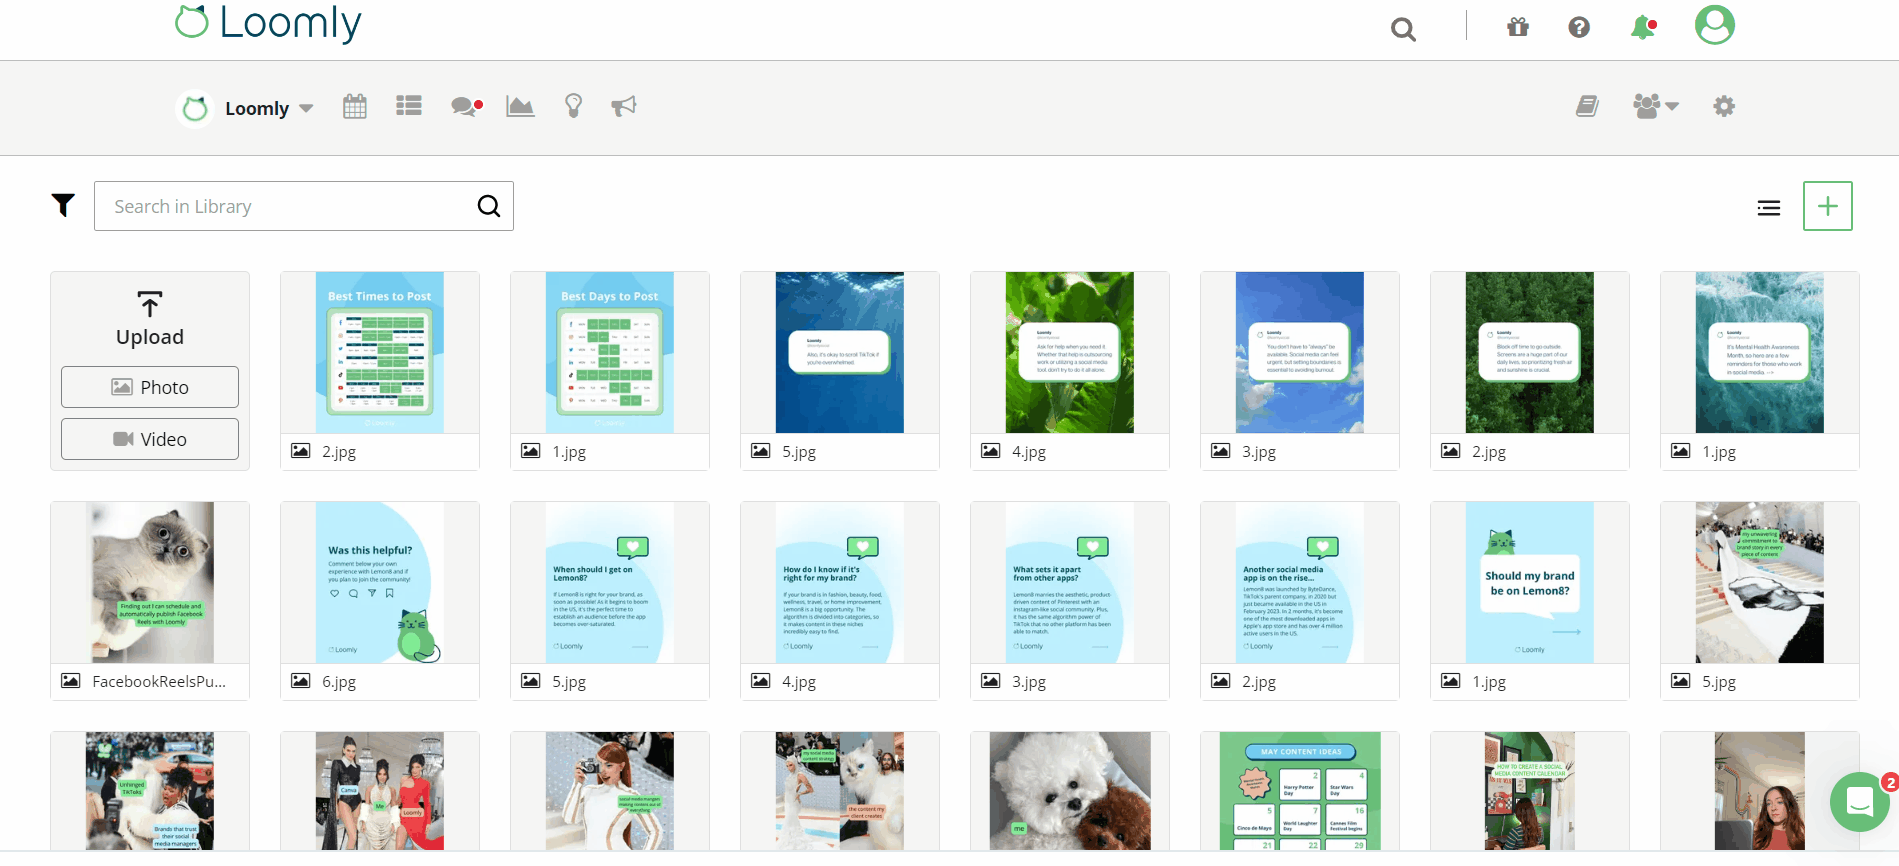
In Grid View, you can easily navigate through your assets by clicking on the arrow so that you aren’t dealing with an infinite scroll. You can also filter your assets using the following criteria so you’re only focusing on the assets you want to:
- Asset type
- Labels
- Used In Post
- Manually Marked as Used
- Added On or After
- Added On or Before
- Used On or After
- Used On or Before
In Grid View, you can add photos, videos, notes and templates, as well as upload images from Unsplash.
When you select assets by clicking on them or holding the Shift key and choosing a range of assets, you’ll be given a few options:
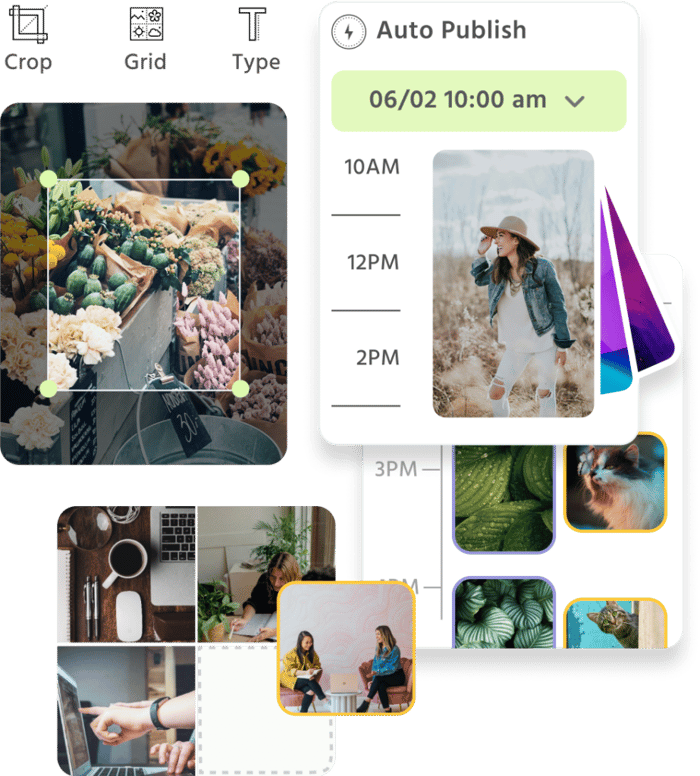
- Create a slideshow to use on LinkedIn, Facebook, and Twitter by selecting multiple images.
- Add labels in bulk to multiple assets at a time which is a great option if you forgot to label them when you first uploaded the assets.
- Create a post from your choices including combining a note with visuals.
List View
The List View is ideal if you want at-a-glance stats about your assets.
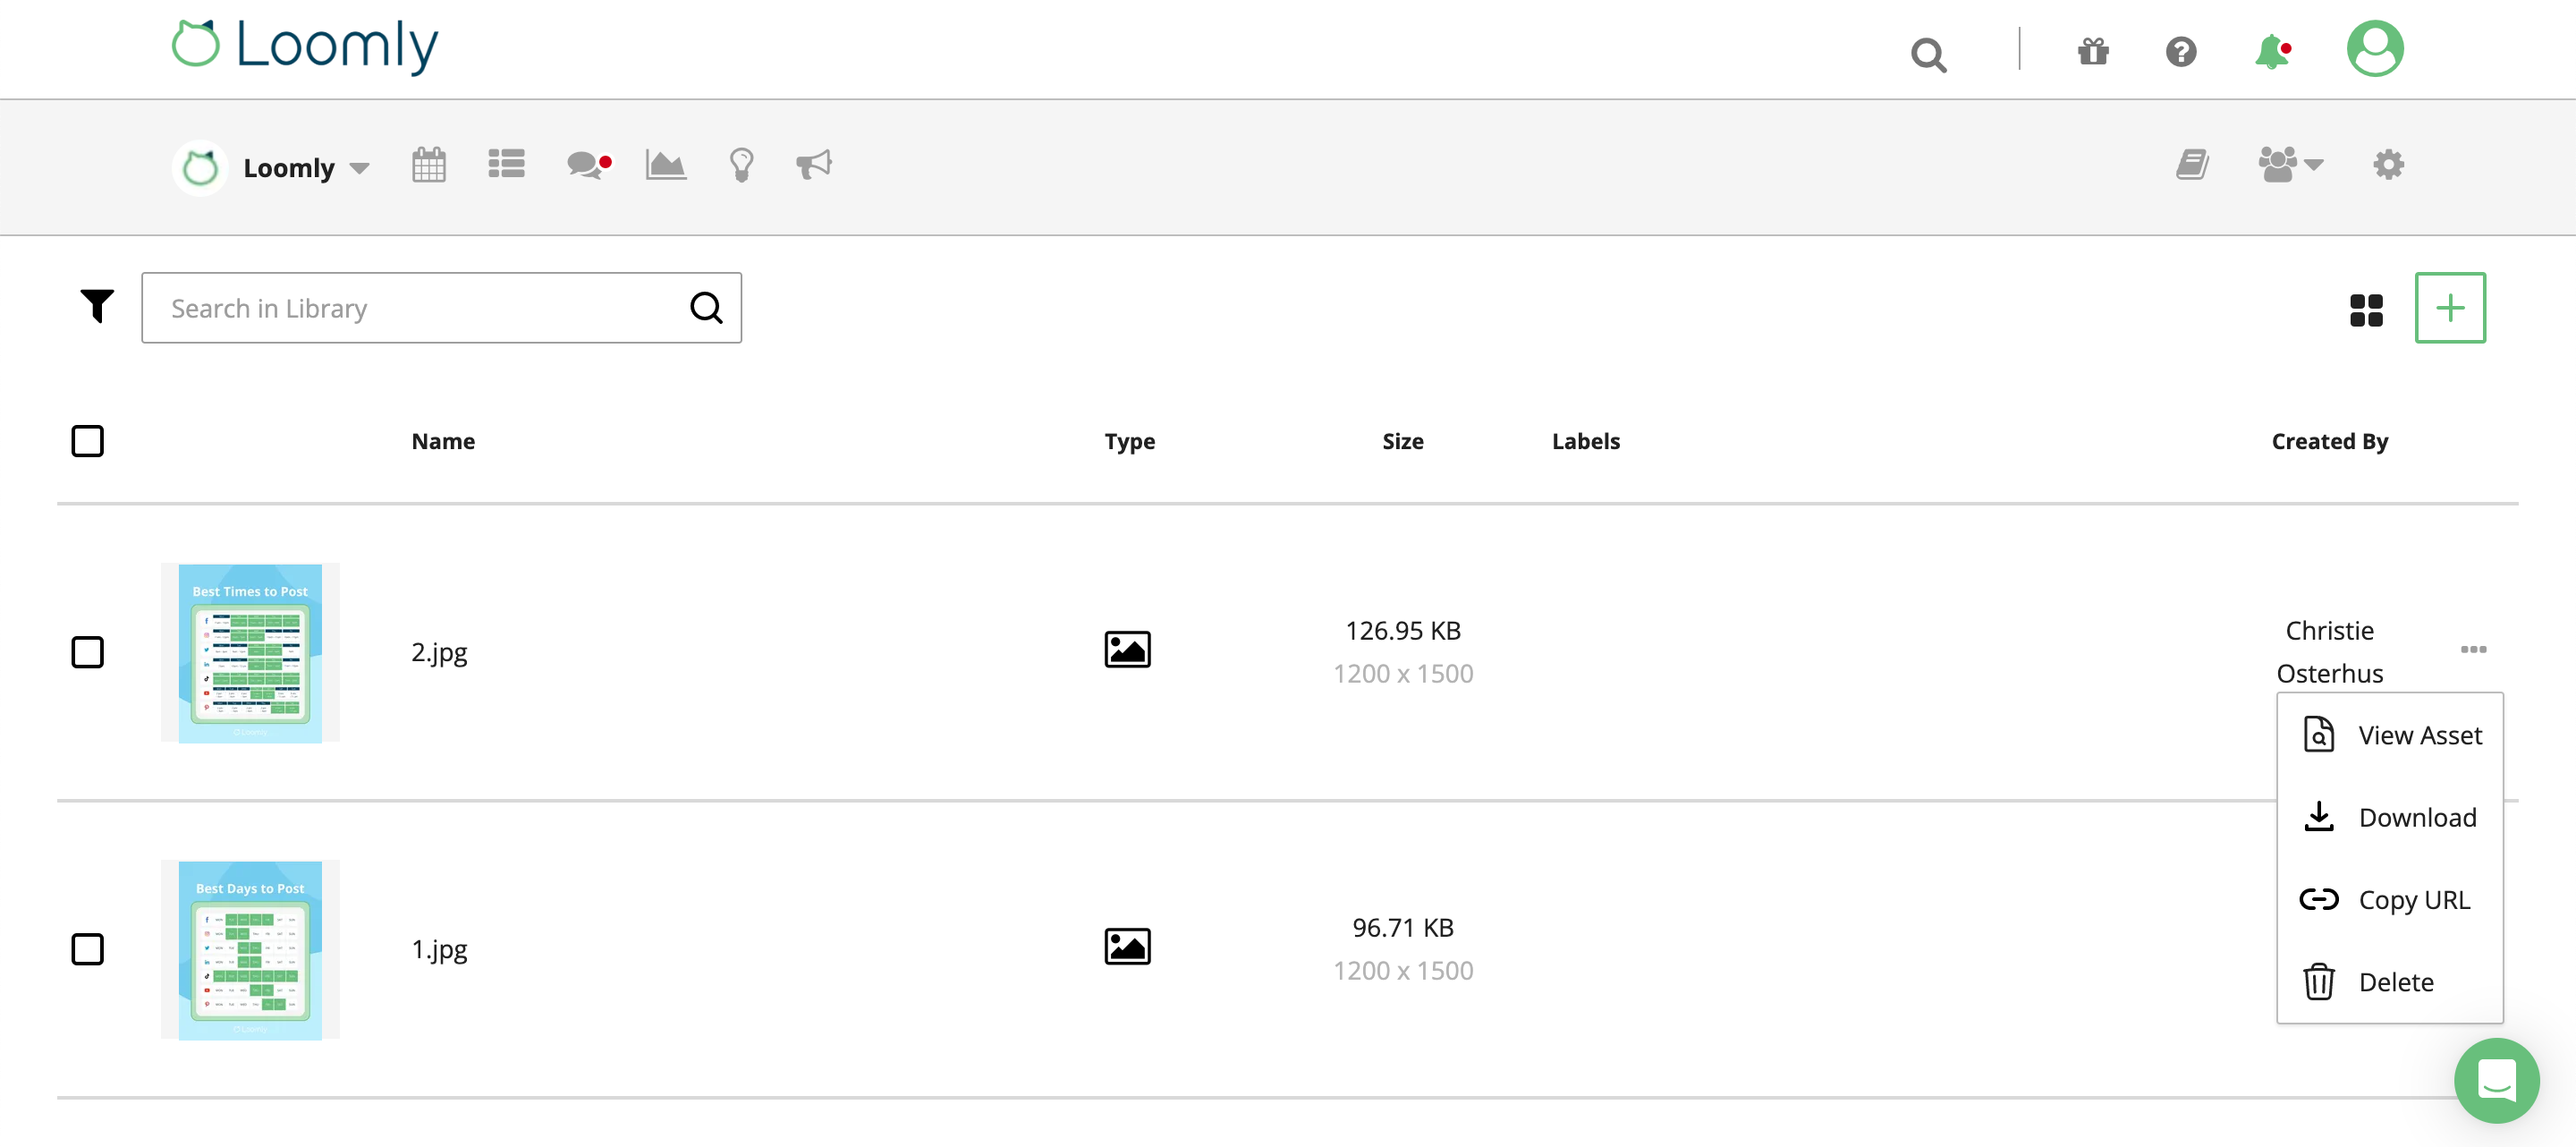 In List View, you’ll be able to see:
- A thumbnail of the asset
- Name
- Type
- Size – this is particularly useful when it comes to posting to social media channels
- Created by
You’ll also have the same capabilities of what to do with the assets as you did in Grid View.
Asset View
From both Grid View and List View, you can access Asset View by clicking on the three dots on each asset or by clicking on the asset in List View.
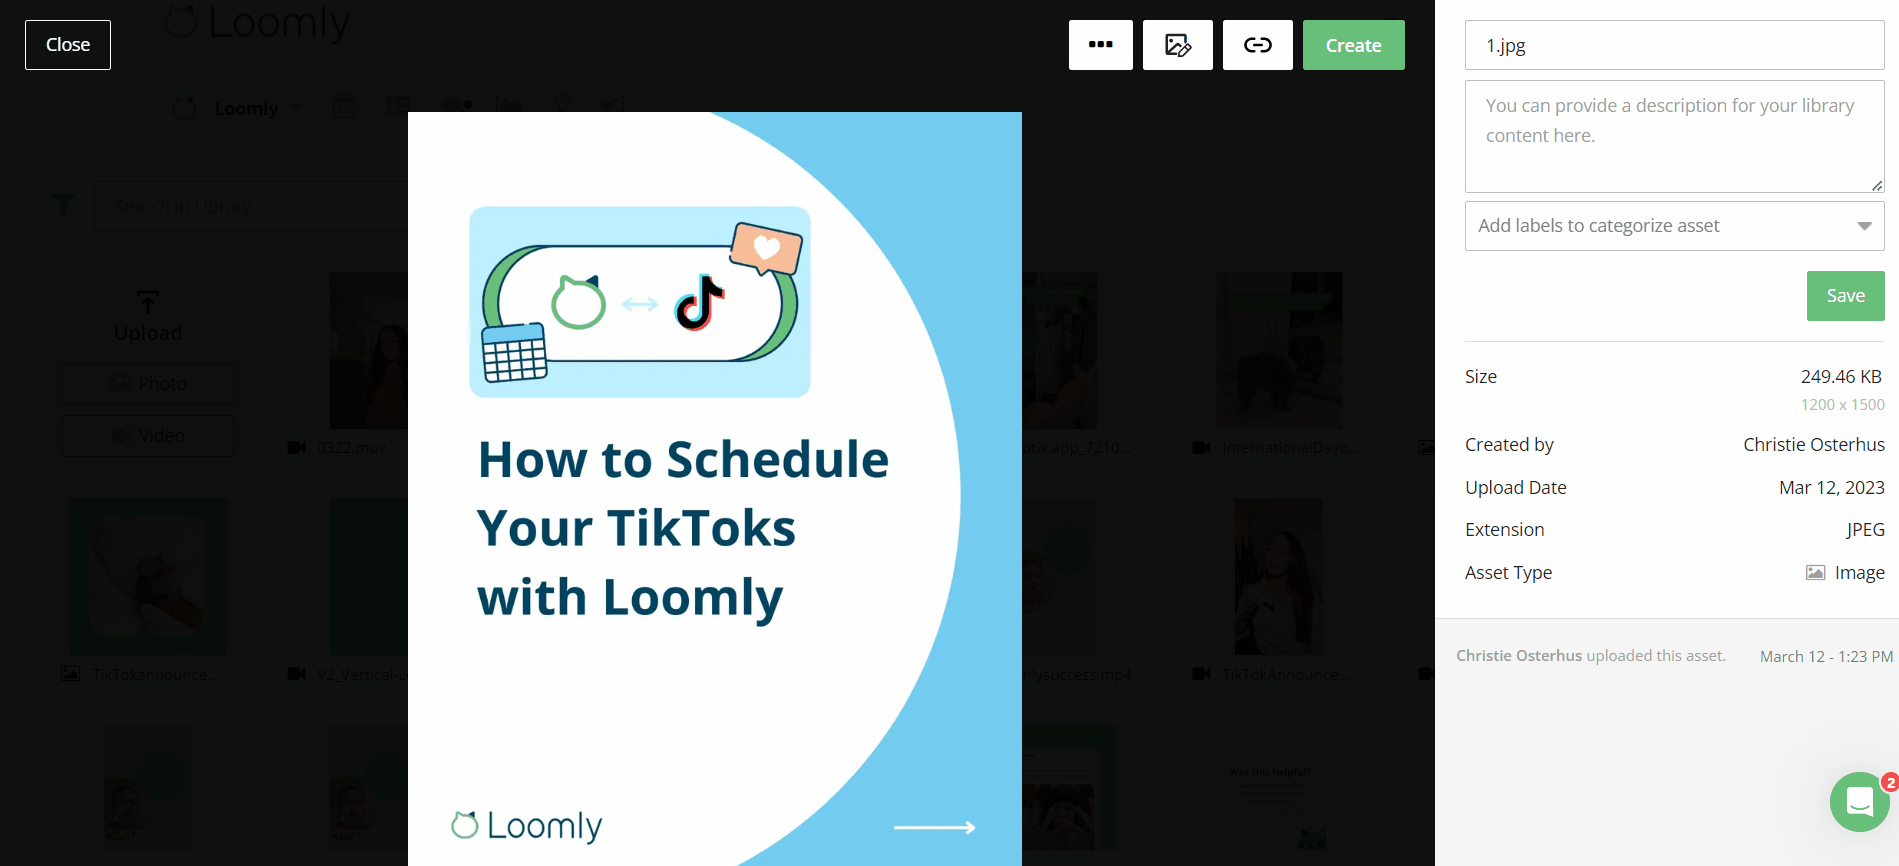
In the Asset View, you can:
- Rename the asset
- Add a description for easy reference
- Add labels
- See the same stats as the list view
- Mark the asset as used
- Share the asset link with collaborators
- Track logs including whether it was used in any posts
- Pro tip: clicking on the post that the asset was used in lets you see even more details. You can even leave comments, which is especially useful to track feedback from your team or clients.
If an asset hasn’t yet been used in a post, then you have two additional options in the asset view.
The first is that you can upload a new version which is great if you already have the labels in place as well as details like the description, but your creative team shared an updated image, for example.
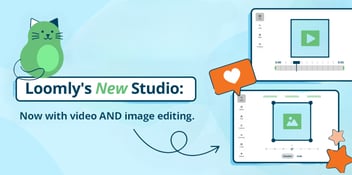
The other option is in Loomly Studio where you can edit images and videos right from your dashboard. You’ll be able to easily change the crop ratio to match different social media channels, add filters, trim videos, change the focus, share text on images, and include an overlay.
Each of these different views provide flexibility for how you can organize and manage your social media visuals in an digestible way.
Ready to see how Loomly can help you organize your content and streamline your social media marketing workflow? Start you free trial today!