
How to Build a Social Media Calendar: A Step-By-Step Guide
Consistently planning and publishing high-quality content on social media is challenging and time-consuming, especially if you’re managing multiple accounts.
Well, it turns out that you can make the process — and your life — incredibly easier. Instead of using spreadsheets to manage content and emails to collaborate, you can organize your entire publishing schedule in a social media calendar.
In this guide, we’ll explain what a social media calendar is, and how it can help marketers and businesses. We also have a step-by-step guide and five handy tools to help you create your social media calendar today.
Table of Contents
- What is a social media calendar?
- Who needs a social media calendar?
- Why you need a social media content calendar?
- How to create your social media calendar in 5 easy steps?
- How to manage your social media calendar?
- 5 best social media calendar tools
What is a social media calendar?
A social media calendar helps organize how you plan, schedule and publish all your social media posts across different platforms and accounts. It can be a detailed spreadsheet or part of an application that simplifies social media marketing.
The calendar is typically organized by publishing date and shows the social media channels where each post will be published.
It can also be referred to as an editorial calendar. It is designed to make social media content planning and posting easy, so you can keep your collaborators, clients and target audience happy with high-quality and consistent content.
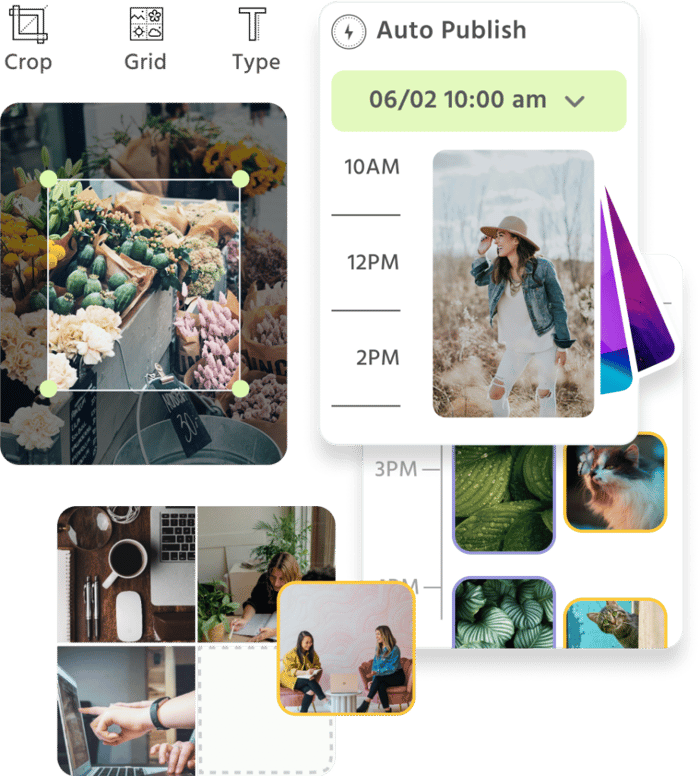
Here’s an example:
 (
(An overview like this can help marketers collect data and make strategic decisions to elevate their company’s social media presence and audience engagement.
A social media content calendar can come in a variety of shapes and forms:
- From the humble printed worksheet: download your free social media calendar template.
- To the online, editable Google Doc file: check out this free social media calendar template.
- To a professional, dedicated tool, such as Loomly.
No matter which method you choose, for each post, you’ll generally want to keep track of (at least) five key elements:
- Which social networks you’re posting on.
- The date and time each post goes live.
- Any pictures, videos, or audio clips it uses.
- Comments, notes and approval from team members as the post is being created.
- Post-publishing metrics (such as likes, comments and shares) to track the success of each post.
We know this can feel like a lot, because it is!
But here’s the deal:
Keeping track of this data is essential to ensure you plan for the future while analyzing and improving on the content that resonates most with your audience.
Unlike traditional marketing, where you bombard prospects with sales messages – social media is a two-way process. You need to listen, engage, show empathy, become involved, and provide value if you want to create a seamless relationship with your prospects that can eventually lead to sales
— Jeff Bullas, JeffBullas.com.
A calendar can help you create a successful social media strategy to achieve your goals. These goals can include:
- Expanding your social media presence
- Boosting the number of followers
- Increasing audience engagement
- Adding structure and accountability to your content creation process.
Who needs a social media calendar?
The short answer: probably every brand — from startups and SMBs to agencies and larger organizations.
Here’s a few specific ways in which it can help:
- For Freelancers & Agencies: collaborate efficiently with your clients, maintaining their brand identity and ensuring consistency in their brand storytelling.
- For Startups: track important audience metrics to analyze and improve upon the success of your posts.
- For Small & Medium Businesses: save time by planning posts at the beginning of the month and working in a batch.
- For Larger Companies: improve editorial workflow and accountability by connecting with your social media team at multiple stages of the publishing process.
- For Everyone: keep your readers happy with consistent, high-quality content by optimizing your editorial workflow, tracking data on successful (and unsuccessful) posts, and moving onto the next month with new insights and new goals.
Want in?
Read on:
Why you need a social media content calendar
While the specific benefits mentioned above are excellent, there are overall advantages of using a social media calendar for every professional and company:

1. Improve content processes
From ideation to posting, everything is streamlined when you use a social media content calendar. You can organize content, keep all your assets in one place, and plan posts for all your social accounts in advance.
This organization can improve collaboration and lead to more efficient content creation and publishing processes. For example, a unified content calendar can lead to a faster approval workflow.
2. Maintain consistency
Marketers and small business owners often have a lot on their plate. Manually sticking to a consistent posting schedule can be hard.
By scheduling posts in advance, they can ensure that posts are regularly published at the perfect time to reach their target audience. This is important since followers will know what to expect and can interact with your content easily.
A social media scheduling tool also ensures that there are no interruptions or delays to the posting schedule during vacations, national holidays and other instances.
Consistency also applies to maintaining the brand voice for each social media channel.
A content calendar helps maintain brand identity since you can create content in advance and get it approved before publishing.
3. Boost content quality
A social media calendar allows marketers to properly plan and create engaging posts.
They can focus on content quality and connecting with their target audience rather than rushing through content publishing based on their hectic schedules.
A calendar also makes it easier to create a cohesive content flow from one post to the next.
So, each post serves a purpose and is part of an overall campaign instead of your social feed being a scattered collection of different posts.
4. Capitalize on trends and holidays
The latest trends, major holidays, and upcoming events are crucial for social media marketing.
These dates and events allow social media managers to create targeted campaigns and content to lead consumers down the sales funnel and boost revenue.
Social media content calendar software like Loomly can help you find trends and create social posts to capitalize on them. You can also plan ahead for holiday and event-related posts.
Every important date relevant to your marketing efforts, be it a company anniversary or a special sale, can be marked in advance, and posts can be created to cater to them.
5. Grow your audience
All of the benefits we’ve mentioned above, combined with analytics, can help marketers, freelancers, and small businesses reach their actual target audience, engage with them, and increase their followers.
Scheduling posts in advance also enables marketers to explore new opportunities and sponsorships on social platforms. They can also approach influencers for collaborations that’ll amplify their reach.
Better planning, more time, and detailed analytics enable users to prioritize other elements, like paid advertising and sponsored content, to create a cohesive multi-platform marketing campaign.
How to create your social media calendar in 5 easy steps
Here at Loomly, we’ve created this simple step-by-step guide to break down the process of building your social media calendar and managing each part of your editorial and publishing process efficiently.
Before we dive into the guide, however, there’s a crucial step that marketers must complete — a social media audit.
This audit is a deep dive into your social media accounts and statistics, like engagement and ROI, to understand where they currently are, what’s working, and what needs to be improved.
The data from this audit can be used to modify or overhaul your cam social media campaigns to be more effective and create a calendar accordingly.
Step 1 | Define your publishing guidelines
Creating your social media calendar is all about producing and publishing better content for your audience.
But here’s the kicker:
Setting up an editorial calendar for maximum efficiency and optimum results requires some groundwork before creating your first posts — defining your publishing guidelines.
Those publishing guidelines are like a brief that you can refer to down the line to ensure you’re still in line with your strategy.
Now:
Below are the 5 essential building blocks of a strong social media calendar brief, which you can put together by making a series of very simple decisions.
Step 1. 1 | Craft your editorial line
Your editorial line is a set of rules that determine how you communicate.
Crafting your editorial line doesn’t have to be a complicated process.
In fact, it can be as simple as answering a few simple questions on a one-pager:
- Personas: who are you publishing for? (demographic, social and occupational groups.)
- Themes: what do you want to publish about? (topics to be tackled and topics to be avoided.)
- Hashtags: are there hashtags you want to emphasize? (brand, product, campaign, season, “coined” term, etc.)
- Angle: how do you want to approach the subject you publish about? (being educational, informative, entertaining, etc.)
- Voice: who’s “speaking” in your posts? (who’s virtually or literally “signing” your posts.)
- Tone: how do you talk to your audience? (with assertiveness, pedagogy, complicity, etc.)
Note: you will find a free, downloadable Social Media Publishing Guidelines template, including a section dedicated to editorial line, at the end of Step 1.5.
Next:
Step 1. 2 | Choose your social channels
You may already know the social networks on which you want to establish your brand.
If you don’t — or if you are having second thoughts — we have put together this simple social media cheat sheet, providing you with the most synthetic definition of each platform’s unique value proposition (namely: Facebook, Twitter, Instagram, Pinterest, Google+, LinkedIn, Snapchat, YouTube, Tumblr, Medium, Reddit, Quora, VKontakte, Sina Weibo, & Steem.io) :

Made your decision?
Perfect, then:
Step 1.3 | Decide how frequently you are going to publish
There are several studies around how to optimize the number of posts you publish daily so you can maximize your reach on each social media platform.
In general, more posts are better to keep your audience engaged, but we highly recommend keeping an eye out on how many high-quality posts you are able to commit to posting every week (or every month).
Quality vs. quantity. It’s the age-old battle between marketers. Is less really more or is more the new black? Less is more. But only when that content is: relevant, valuable, and personalized.
— Rebekah Radice, RebekahRadice.com
Keep in mind:
Building a brand and a community is more like running a marathon than a sprint. Consistency is the most important key success factor in the long run. (Tweet this social media word of wisdom by clicking here.)
And:
Step 1.4 | Determine your editorial cadence
Editorial calendars are typically set up on either a monthly or weekly cycle:
- Monthly calendars can help batch content work together to get a lot done faster.
- Weekly calendars can help you pivot and adjust quickly as you adapt to new data more frequently.
The right cycle length for your team depends on how often you want to sit down, analyze the previous cycle, and prep for the next one.
Last but not least:
Step 1.5 | Define your approval workflow
Your approval workflow is the process of reviewing content before it goes live to ensure the right post gets published at the right time, on the right platform and by the right person.
This workflow helps create a layer of accountability in case a post makes it onto Facebook with a typo or an Instagram Story goes viral.
Depending on the size of your team and the level of accountability you need, your review and approval workflow may vary:
- If you work on your own: a simple checklist for yourself reminding you to check your posts for potential typos, broken links and incorrect visuals will keep you on track.
- If you need approval from one collaborator: share a similar checklist with the person in charge of approving posts. Have clear approval deadlines and include some buffer time for some back-and-forth.
- If you need approval from multiple collaborators: go with a more comprehensive team-wide, sign-off process to collect approval from your legal, marketing, and editorial departments before posting.
Free Bonus: click here to download your free Social Media Calendar Brief Template that shows you how to define your publishing guidelines, as defined above, in a simple and actionable way.
That’s it:
Once you have defined your editorial line, social channels, publishing frequency, editorial cadence and approval, you can start creating content.
Let the fun begin:
Step 2 | Fill your calendar with post ideas
Going straight from a blank page to a whole bunch of fully-fledged social media posts may seem overwhelming.
Because (again) it is!
Like with any big task, the secret is to break it down into smaller pieces.
This is where the magic happens:
At this stage, you do not need to create actual posts: all you need are post ideas.
When you start planning your ideas, you can get inspired. It’s often easier to come up with ten ideas in one go than ten ideas individually when you’re on a deadline!
— Ian Cleary, RazorSocial.com.
And it gets better:
As you have already defined how many posts you want to publish, you now have a very clear goal to achieve.
Want to know the best part?
There is actually a simple method to hit that number, whichever it is, and that’s as easy as 1, 2, 3.
This method actually works very similarly to the Rocks, Pebbles & Sand Story:
Step 2.1 | Mark down important dates for your brand
First things first, let’s start with what you know best: your brand.
Simply list events that matter to your brand and your audience, such as:
- Product releases, sales and special events.
- Brand or company milestones such as anniversaries, achievements and awards.
- Major holidays and events in your field.
You want to start with these type of post ideas, as they tend to be date-related and offer limited flexibility as to when you can publish about them.
Just like that, you should get between 30% and 50% of the post ideas you need for your next publishing cycle:

(These are your “rocks”: now, on to the “pebbles”.)
Step 2.2 | Strategize publishes based on days of the week
Planning content for your major events and holidays has probably left you with several empty dates, and you need to find other inspiration to keep your publishing tempo consistent.
Before finding fresh post ideas, you want to strategize the best days to publish your posts for every social media platform.
Here is a brief summary of the best days to post on social media based on proprietary research and third-party studies:

Now:
You can hunt for post ideas inspired by those days of the week:
- Relative dates: leverage internet codes everyone knows, like #TBT or #TGIF. Louise Myer’s list of 129 hashtags for each day of the week is a great place to look for such post ideas.
- Absolute dates: celebrations, “international days of …”, sporting events, major movie releases and season changes are all good candidates for particular dates narrowed down by those days of the week during your next publishing cycle. Check out Days of the Year, This Day in History, Topend Sports and Movie Insider for those post ideas.
This should provide you with another 20% of the posts ideas you need:

(These are your “pebbles”: time to take care of your “sand”.)
Step 2.3 | Fill in the gaps with evergreen ideas
You are probably left with several empty dates in your social media planning calendar and need to find additional inspiration to keep your publishing tempo consistent.
Here are some efficient ways to source additional post ideas for evergreen content:
- Feature user-generated content, such as a follower mentioning your brand or your product in one of their posts.
- Curate content with tools like Pocket or Flipboard and find an insightful or interesting third-party piece.
- Look at some of your older posts that performed outstandingly well and replicate your thought process.
- Look at what competitors are doing and repurpose an idea for your brand and your audience.
- Check out social media trends, breaking news and weather forecasts to get hot, contextual ideas.
The above should provide you with the last 30% to 50% post ideas you need for your publishing cycle:

(You just got yourself some “sand”: your jar is now full, great job!)
Loomly Tip: you can leverage Loomly’s built-in Post Ideas feature to fill your social media calendar. From Twitter Trends, to RSS feeds, date-based events and evergreen advice, you will never run out of inspiration for your social campaigns.
To sum up:
At this stage, you should have a clear scheduling roadmap of what you’ll publish, on what dates and on which social networks.
Very well done: that’s a huge achievement!
Step 3 | Create and customize posts for every social network
It’s (finally?) time to transform your ideas into actual posts.
Note: depending on the configuration of your team and the approval workflow you defined in Step 1, your next task may vary:
- If you are a one-person team in charge of your own brand, it’s a good time to create full and final versions of your posts.
- If you need at least one collaborator to review and approve posts, you should have them review your post ideas before proceeding.
Essentially, a social media post is made of three elements:
- Publishing date and time
- Text
- Asset

Let’s take a look at each element one by one.
Step 3.1 | Publishing date and time
At this stage, you should be all set in terms of publishing dates (see Step 2.2).
You now need to determine the best publishing time for each social network to create a complete social media posting schedule.
Here is a brief summary of the best times to post on social networks, based on proprietary research and third-party studies:

Keep in mind:
This is a general guide. Your audience is unique, and the only surefire way to find the best publishing times is to experiment with different times (starting with the ones suggested above), measure your posts’ engagement rate, learn from that and start again.
Step 3.2 | Text
A social media post tends to be quite short, and crafting the copy for it generally comes down to making a series of small decisions about a few core components:
- Plain text: this is the core message of your post and you want it to be aligned with your editorial line and within the limitations enforced by each social network (i.e. 280 characters on Twitter).
- Punctuation: introducing question marks and exclamation points may help liven up your post and make it more engaging for your audience.
- Links: including a link in a post is a great way to point your audience in a specific direction and invite them to take action. On Facebook, Twitter, and LinkedIn, you will be able to decide whether you want to include link metadata in your post as well and generate a link preview (called a Twitter Card on Twitter) — or not.
- Hashtags: using hashtags in your posts allows you to both add meaning to your message and make your post more viral, letting users find it when searching for a hashtag it includes.
- @mentions: tagging another account in a post, be it a brand or an individual, provides you with an opportunity to ping them publicly, potentially establishing a connection between your audience and theirs.
When you publish the same post on multiple social networks, you can use the exact same text on all platforms. But, you must customize your post for each service, complying with technical limitations, community best practices and audience expectations.
For instance, if you publish the same post to Facebook, Twitter, Instagram & LinkedIn, you may want to have a base version of your post for Facebook, a shorter version for Twitter, sprinkle in hashtags for Instagram and make it a bit more formal on LinkedIn.
Loomly Tip: when you create a post in Loomly for multiple social networks, you can define some generic content that will be applied by default to all channels, and then customize that content for each platform.
Last but not least:
Step 3.3 | Assets
Social media posts include many multimedia assets, like:
- Photos: static images and animated GIFs to convey a message in a snap.
- Videos: uploaded files, live recordings and stories share more information in a playful format, optimizing for the attention span of your audience.
- A combination of the above: slideshows, albums and carousels to encourage your audience to consume and interact with your content.
Here are three ways to come up with great visuals for your social media posts:
- Original visuals: if you have some basic design or photography skills, put together some custom assets for your brand and your audience with tools like Adobe Photoshop, Canva or Easel.ly.
- User-generated content (UGC): feature content published by your audience (with their written consent) about your brand, such as a quote, a product review or a nice picture including your product.
- Stock photo banks: source assets from online stock image websites, like iStock (Getty Images), Unsplash (free, high-resolution photos) and Giphy (animated stickers and GIFs).
Once you source your social media assets, create a content pool: this is a fancy word for a Dropbox or Google Drive folder where you save all your visuals, both from published posts and for future posts.
Loomly Tip: you can store, organize and use photos, videos, notes, links and post templates in Loomly’s built-in intuitive Library.
Again, if you publish the same post on multiple social networks, you will ideally want to optimize your assets for each platform.
You can alter file format, aspect ratio and size to achieve the best quality possible within each service’s technical limitations.
You just transformed your list of post ideas into an actual content plan.
On to the next step:
Step 4 | Review, approve and schedule posts
At this stage, you may be tempted to take your freshly created posts and simply put them online: that seems pretty natural.
But what if there was a better way to proceed? One that allows you to boost both the quality of your posts and the efficiency of your publishing process?
There actually is a way:
Reviewing, approving and scheduling your posts is one of the most underrated yet crucial steps of the publishing process.
Step 4.1 | Review your posts
If you use a spreadsheet — be it Microsoft Excel, Apple Numbers, Google Sheets or any other open source format — chances are your social media posts will look something like this at this stage:

While that is certainly fine, a document like this may not provide you with the best context to review (or preview) your posts, figure out how they will render once published, and see how good they are.
One option is to generate mockups of your posts, for instance creating some templates with Adobe Photoshop:

You may be thinking:
How is that additional work supposed to streamline my publishing process?
When you need to publish many posts or when you work under tight deadlines, a clear review process makes you less prone to errors. Accurate posts increase brand authority and reduce future work required to fix missteps.
Step 4.2 | Approve your posts
The most important reason to generate mockups and preview your posts is to be able to approve them efficiently, i.e., in a fast and reliable manner.
Loomly Tip: Loomly automatically generates Posts Mockups for you and your team before you hit publish. No pain, all gain.
This benefits your approval workflow, regardless of who is involved in it:
- If you approve your own posts: this will provide you with peace of mind, making sure that WYSIWYG.
- If you need approval from one person: sending a mockup to your manager, client or partner will make it incredibly easier for them to get back to you with a clear GO or NO GO, as well as feedback.
- If you need approval from multiple persons: sharing a mockup will allow everyone to be on the same page, minimizing room for interpretation between your legal, marketing and product team members for instance.
As a rule of thumb, you want to proofread your posts for:
- Consistency with brand values (message).
- Compliance with brand guidelines (format).
- Alignment with brand strategy (goals).
- Any potential contextual risk (trending news).
- Residual typos.
Ideally, you want to implement an approval system allowing you to keep track of team feedback, save post changes and make collaborators accountable for their actions (you know, in case something goes wrong).
You can usually bet on one of the following three solutions :
- A DIY kit: think spreadsheets, Dropbox, email and Slack.
- A generic project management and creative suite combo: Basecamp, Asana or Monday combined with Adobe Photoshop or Canva, to name a few.
- A dedicated social media calendar tool: Loomly offers an end-to-end collaborative review workflow including post mockups, approval statuses, commenting system and version history.
Regardless of the approach you choose, at this stage, you should have a beautiful (list of) post(s) ready to go live.
It’s (finally) showtime!
Step 4.3 | Schedule your posts
To take your approved posts from your social media calendar to your audience’s eyeballs, you have three options:
- Check out your social media calendar every day and manually publish posts accordingly: this is relevant if you publish sensitive content and you want to review each post one last time right before publishing it.
- Create reminders in your “regular” calendar and get alerted when a post needs to get published: this is more practical if you tend to have a fluctuating schedule and can’t check your social media calendar every day.
- Schedule your posts in advance for automated publishing: this is the best option to optimize productivity and minimize publishing mistakes.
Let’s focus on Option 3, which tends to be the norm in the industry, as it provides significant upsides:
- Never fall behind schedule: stuck in traffic? Running late for a meeting? Not a problem. Your posts will still get published exactly on time.
- Work in batch: schedule all your posts at once for your entire publishing cycle.
- Focus on what matters: save time on publishing and spend it on creating better content for your audience.
However:
Besides Facebook, very few social networks allow you to schedule posts ahead of time. That means you need a social media scheduling tool to achieve the desired results.
A quick Google Search should return plenty of options.
If you’ve been using a spreadsheet for your social media calendar so far, all you need to do is pick a scheduler and then:
- Select the date and time you want your scheduler to publish for you, according to what has been decided in your social media calendar.
- Paste in the copy from your calendar to your scheduler.
- Upload any asset from your computer or your content pool to your scheduler.
- Schedule!
Repeat the process for each post that has been approved, look at your posts getting published automatically, and relax.
Loomly Tip: as a social media calendar including a built-in scheduler, Loomly allows you to automatically schedule your posts upon approval — no more copy/paste.
Step 5 | Measure and improve on your audience engagement
Okay, a couple of days (or even weeks) have gone by and you’ve published awesome posts to your social media accounts.
Now is the time to review how those posts performed and better understand what your audience really wants.
Tracking performance metrics can help you identify what went well and what went wrong for every post. This helps you connect better with your audience with each new post.
You have a couple of options to proceed:
- Native social network analytics: most social networks provide native analytics features which help you track how well (or not) each post did.
These tools can be convenient because they don’t require additional charges or applications. However, you’ll need to go to each social media platform to collect data and save everything manually into your social media calendar (or a standalone report).
- Dedicated social media analytics tools: premium features from social media management tools or standalone analytics software can provide insights across multiple social platforms to streamline your analytics, reporting and optimization process.
Loomly tip: Loomly’s Advanced Analytics provides account, post and link metrics and lets you compare performance over time.
Regardless of the approach you choose, you’ll want to keep an eye out for at least a few data points:
- Impressions and reach are solid indicators of brand visibility. They show you how many times and by how many people a post has been seen.
- Likes, reactions, comments, clicks and shares are absolute measures of engagement. They tell you how users have interacted with a piece of content and how many times.
- Engagement rate is the king of metrics, defined as the ratio of engagements / reach (or, sometimes, as engagements / impressions). It gives you a solid foundation to normalize and compare post performances accurately.
Keeping track of the above metrics at the end of each publishing cycle (weekly, monthly or otherwise), will give you pointers about:
- Where to post: are there social networks where your content performs significantly better than others?
- When to post: is there a pattern in terms of days of the week and times of the day when posts significantly perform better than others?
- What to post about: are there topics, themes subjects that your audience visibly enjoys and engages with more than others?
- How to post: does your audience tend to interact more with certain types of content, such as photos, videos, slideshows or links?
- Who to post for: looking at your audience demographics, can you identify patterns between fans and followers who consistently engage with your posts?
The bottom line:
Keep tabs of what your audience likes (literally) in your social media calendar and leverage those takeaways when creating new posts in your next publishing cycle.
How to manage your social media calendar
Creating your social media calendar means finding the right tools to organize your editorial workflow and tracking data to improve your creation process.
Once you’ve set up your initial social media calendar and publishing schedule, you’ll find that each post will have a simple life cycle: from inspiration and first mockups to creation and approval, and finally, publishing and evaluation.

It’s entirely possible to build these tools and tracking methods yourself. You can use content calendar templates, either through Microsoft Excel or Google Sheets, or print them out and write them by hand (that’s perfectly valid).
However, depending on how much information you’re tracking, you can quickly outgrow these free options. You spend more time figuring out the best template rather than creating great content and building your brand.
5 best social media calendar tools
If you have made it this far into this guide, you’re probably very serious about creating and managing your social media calendar.
Here are five tools that can simplify your social media planning, scheduling, and posting:
1. Loomly
Loomly is a social media management tool that can help you plan, schedule, and publish social media posts with ease.
Using our platform, you and your team can effortlessly map out your social media calendars without relying on different apps and manual scheduling. You can easily create multiple calendars and approval workflows to streamline your social media efforts.
You can also track all relevant analytics needed to improve marketing campaign performance and audience engagement.
2. Sendible
Sendible is a social media management tool that’s best for large agencies.
Sendible is an all-in-one platform that can help you with scheduling content, source content from their trove of post ideas, customize content, and engage your audience, all while having helpful analytics at your fingertips.
3. Planoly
Planoly is an easy-to-use platform that’s an all-in-one solution for your social media planning. You can not only plan and schedule your posts visually, but you can also access their stash of curated weekly trends, and share your content to several channels at once with a simple button.
4. monday.com
Do you want to streamline your entire company operations, not just your social media? Then monday.com is for you.
Perfect for endless projects and uses, monday.com can help you with efficiency and productivity by offering customizable workflow options for your company. You can simplify your work processes by containing them all in one simple Work OS, which is chock-full of collaboration tools, goal dashboards, and automation tools.
5. Trello
To organize your social media publishing workflow, you need a task management tool like Trello. This is especially important for marketing and social teams where many people work on the same campaigns.
A tool like this adds transparency to team projects and improves collaboration. It makes it easier for all team members and stakeholders to track the progress of content creation and publishing for social campaigns.
Conclusion
A social media calendar has become essential for marketers and business owners alike. It enables them to consistently create and post quality content on all their social media channels.
Creating a social media content calendar and scheduling posts manually via multiple tools and social media calendar templates is a good approach. But, it’s time-consuming, error-prone and becomes increasingly unsustainable as your marketing and social media efforts grow.
The best way to build and manage a social media calendar that can scale to your business needs is through a dedicated tool like Loomly, with its feature-filled, easy-to-use content calendar, advanced analytics and a Library to host all your assets.
Want to know the best part?
You can try Loomly for free for 15-days: no credit card required, no obligation, unlimited features. Start your 15-day free trial now.